
I get asked about my studio, it’s set up & the equipment I use all the time on my social media so I thought it was about time I created a tour video! If you’re new here, my name is Shaymus and I’m an artist & art tutor, specialising in soft pastel, oil paint and graphite. I know how confusing it can be and not knowing where to start when you have an art studio so I really hope the recommendations in this video can help you out in any way.
My studio exists in one of the small spare bedrooms in our house, nothing too fancy. Luckily the ceilings are a little higher than usual which makes the space feel a little less cramp. overall, this room is pretty small for the amount of materials and equipment I require to run my art business.
To start, I decided to paint the walls a bright white to keep the room as light as possible, with the exception for my French cleat wall which is a deep, dark brown. It was white previously but it turns out that a darker background colour really allows the artworks to stand out and look even more vibrant, especially on camera.
By no means is my studio perfect, it can certainly do with improvements but the space works really well for what I need and I think I have a good set up that will benefit others with useful ideas too. A little fact from the get go, apart from my Canon Pro-1000 printer which was very generously gifted to me by my grandma for my birthday, everything you see in this studio has all been funded by myself through my online art business which I started after graduating university 2019. It is possible!
Sections of my studio with helpful shopping links:
Entrance & Window Area


My studio has one large window and I actually block the sunlight with a blackout blind and instead get constant, high quality light from my brilliant studio lights which I will talk more about in the next section. Here in the UK the winters can have hardly any light throughout the day, especially if it’s cloudy so the natural light wasn’t sustainable.
In the summer, the studio gets quite hot so my portable air con has been an absolute life saver. Out of everything in the studio, this AC unit is definitely an out of place eye sore but I don’t even mind as without it I would be hot and uncomfortable. I think it fits well in the space it’s in too so that’s a positive. It’s all about being as comfortable as possible so that I can eaisily get lots of work done.
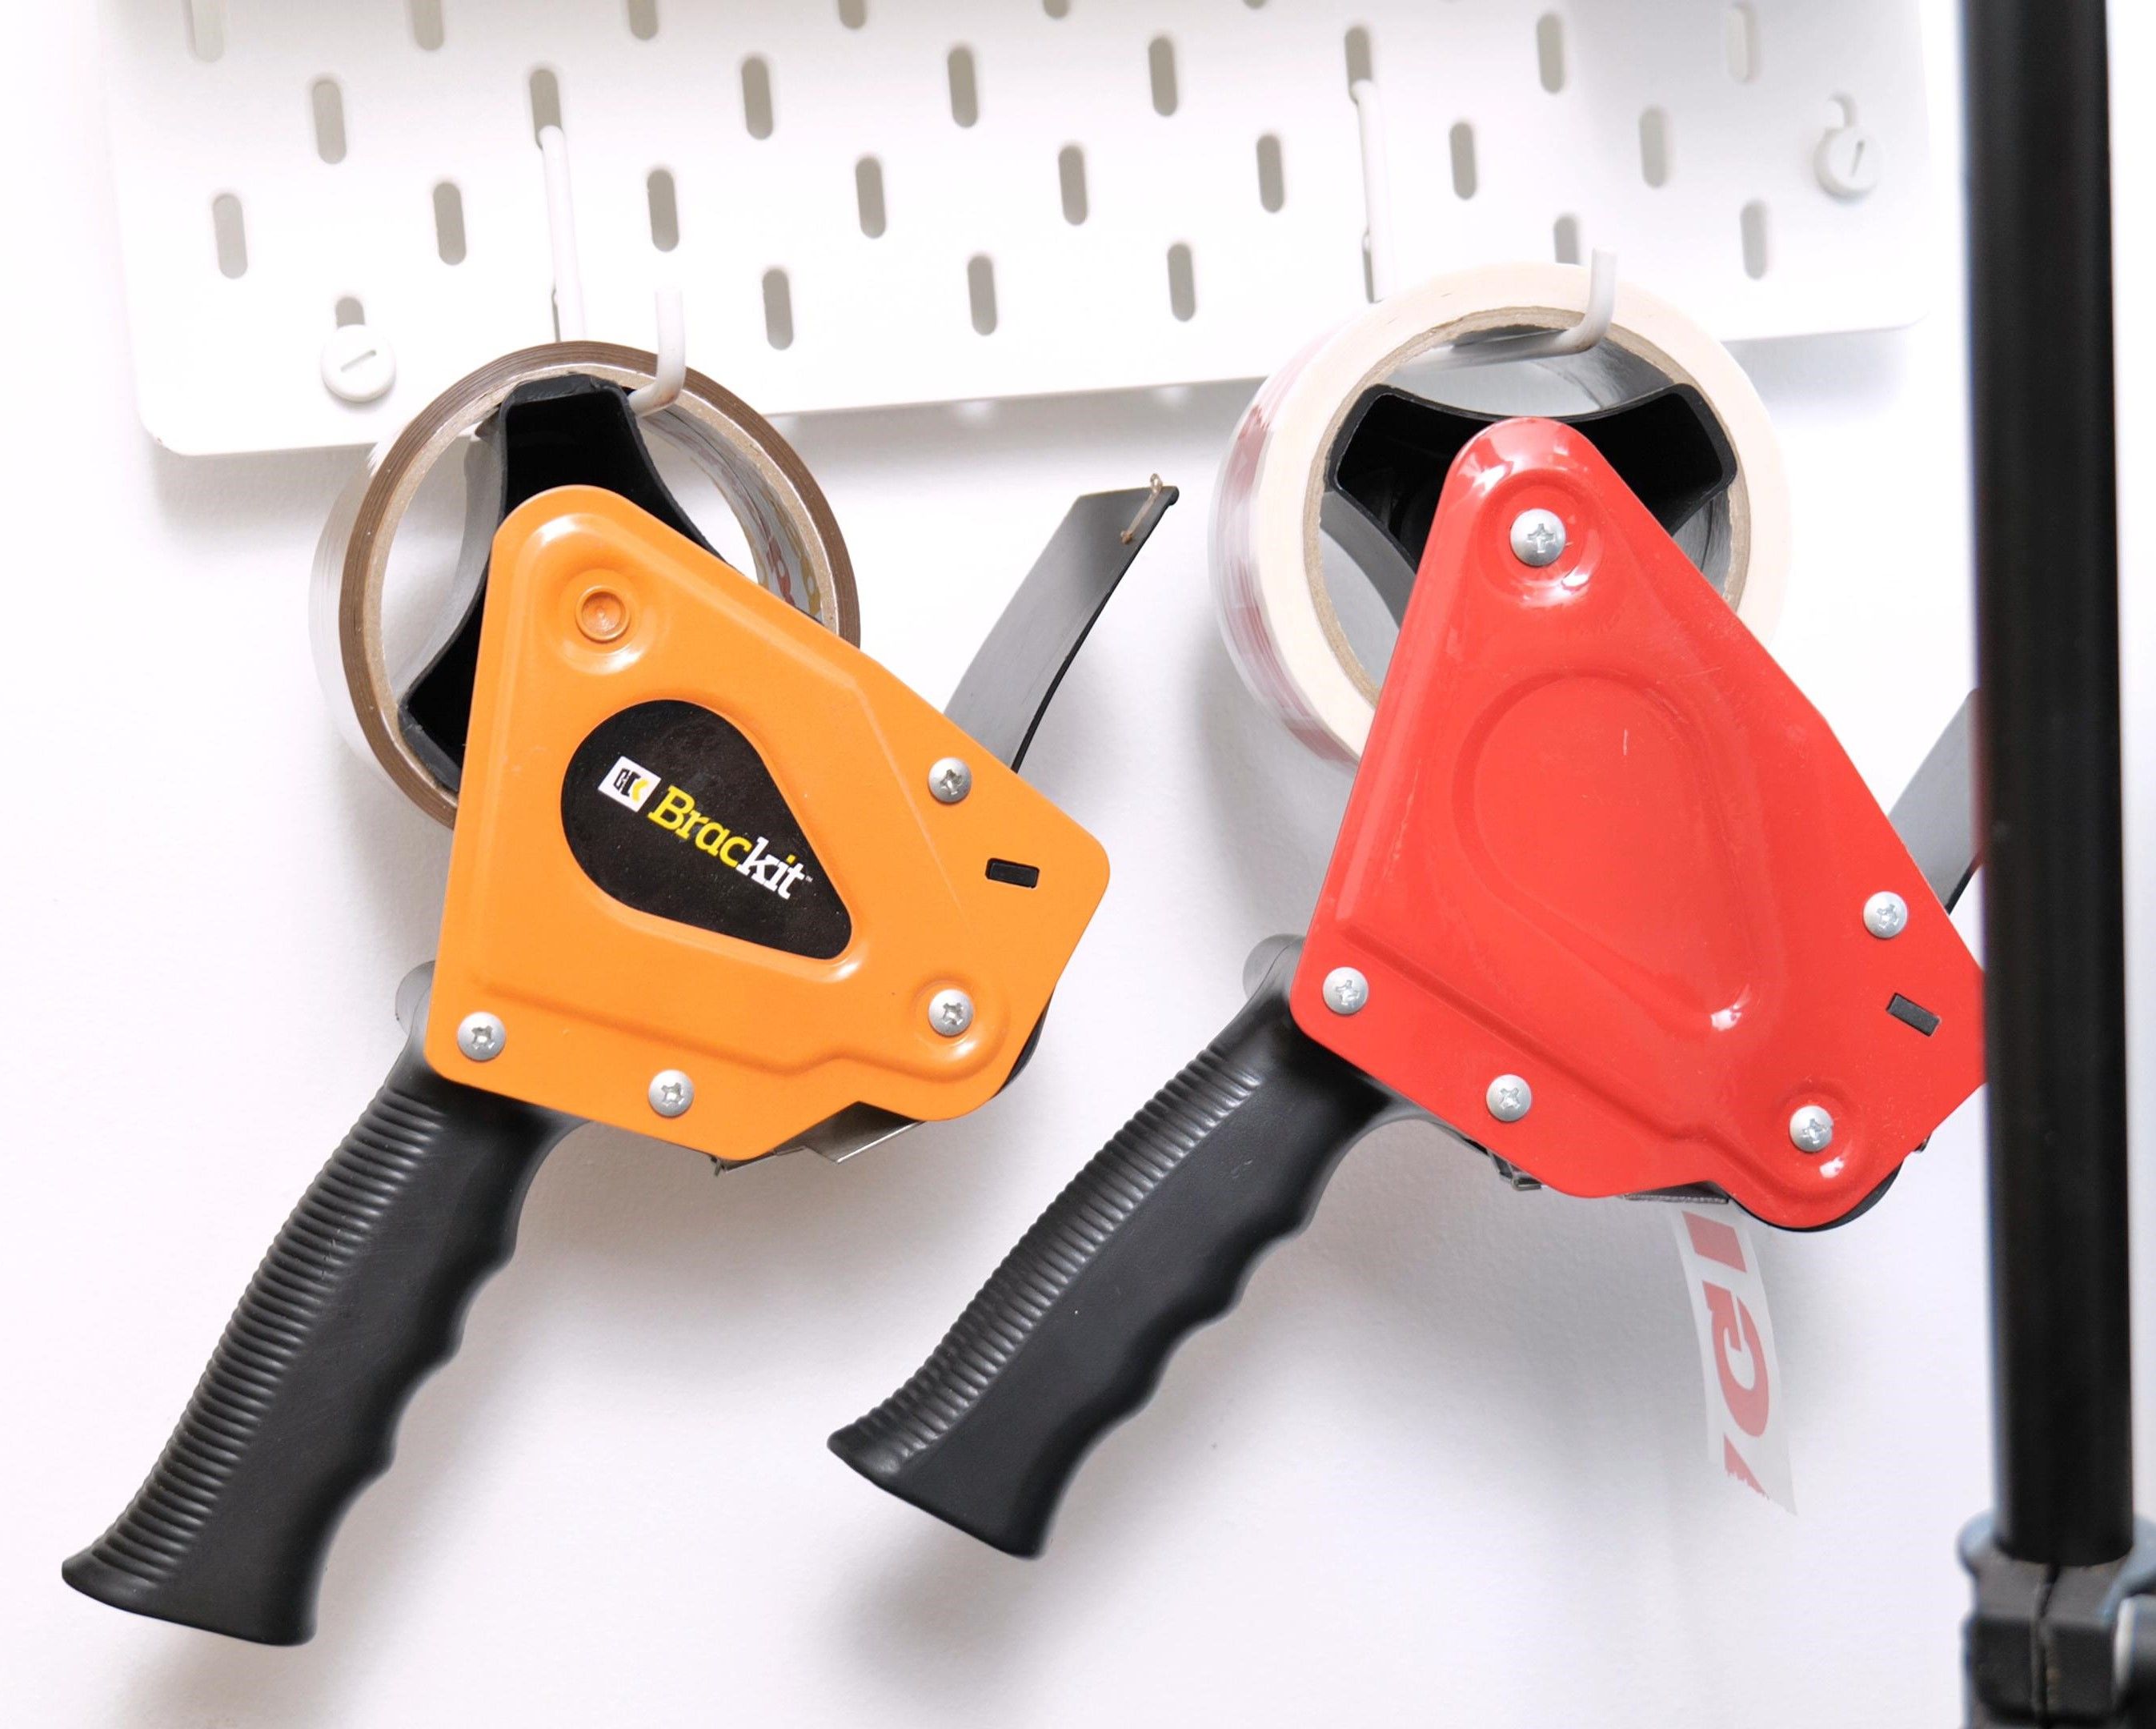
I also have a peg wall here which I purchased from Ikea to hold my main used tapes, pens, scissors, utility knife blades etc. I simply have it in a nearby accessible place for when I need to do things such as pack originals and prints. Ikea have a tonne of great storage solutions so I highly recommend checking out their website for ideas.
– Blackout blind: https://ebay.us/uQhjQX
– Cardboard: https://amzn.to/45ZZ8Bd
– Foamboard: https://amzn.to/451rfP6
– (many options) AC unit: https://amzn.to/3sY5B0Z
– Ikea peg wall: https://amzn.to/46k7kfr
– Tape dispenser: https://amzn.to/3ZsxaLS
– (bulk) Masking tape: https://amzn.to/3LTHt6v
Lighting


I can comfortably say that my studio lights are one of the best purchases I’ve made. They offer natural looking, bright light 24/7 whenever I need it. I can easily turn the dials on the back here or there is also a wireless remote I can use which is very handy. I started with one and loved it so much that I got another – this is so that I can have 2 points of light in the studio so it’s more even which creates a more softer look on video. It also allows me to utilise even more light which allows my camera to pick up as much detail as possible.
The 2nd light however is a slightly upgraded version where I can change the colour temperature of the light which is ideal for things such as white balance. Remember how I previously mentioned how the blackout blinds keep the ever changing sunlight out? well this is important as with these lights, I am able to configure my camera’s settings to perfectly match the tone and exposure of the light. This makes sure that I get correct colours and exposures constantly for any videos or photos at any time of day or night. With ever changing sunlight coming through, both in terms of brightness and colour of the light, the camera settings would have to keep changing which creates much more work.
I know that some artists have the LED panels which look great but these lights in particular are able to produce much a brighter light. When using these lights it’s important to diffuse the light, some people use photography umbrellas but I simply point my lights at my white walls to diffuse and it works really well. I’ve positioned both lights to bounce off the walls and to meet diffused at my French cleat wall where I create all of my artworks.
– SL150II: https://amzn.to/48p6AHW
– (colour changing) SL150Bi: https://amzn.to/44UXobj
French Cleat Wall


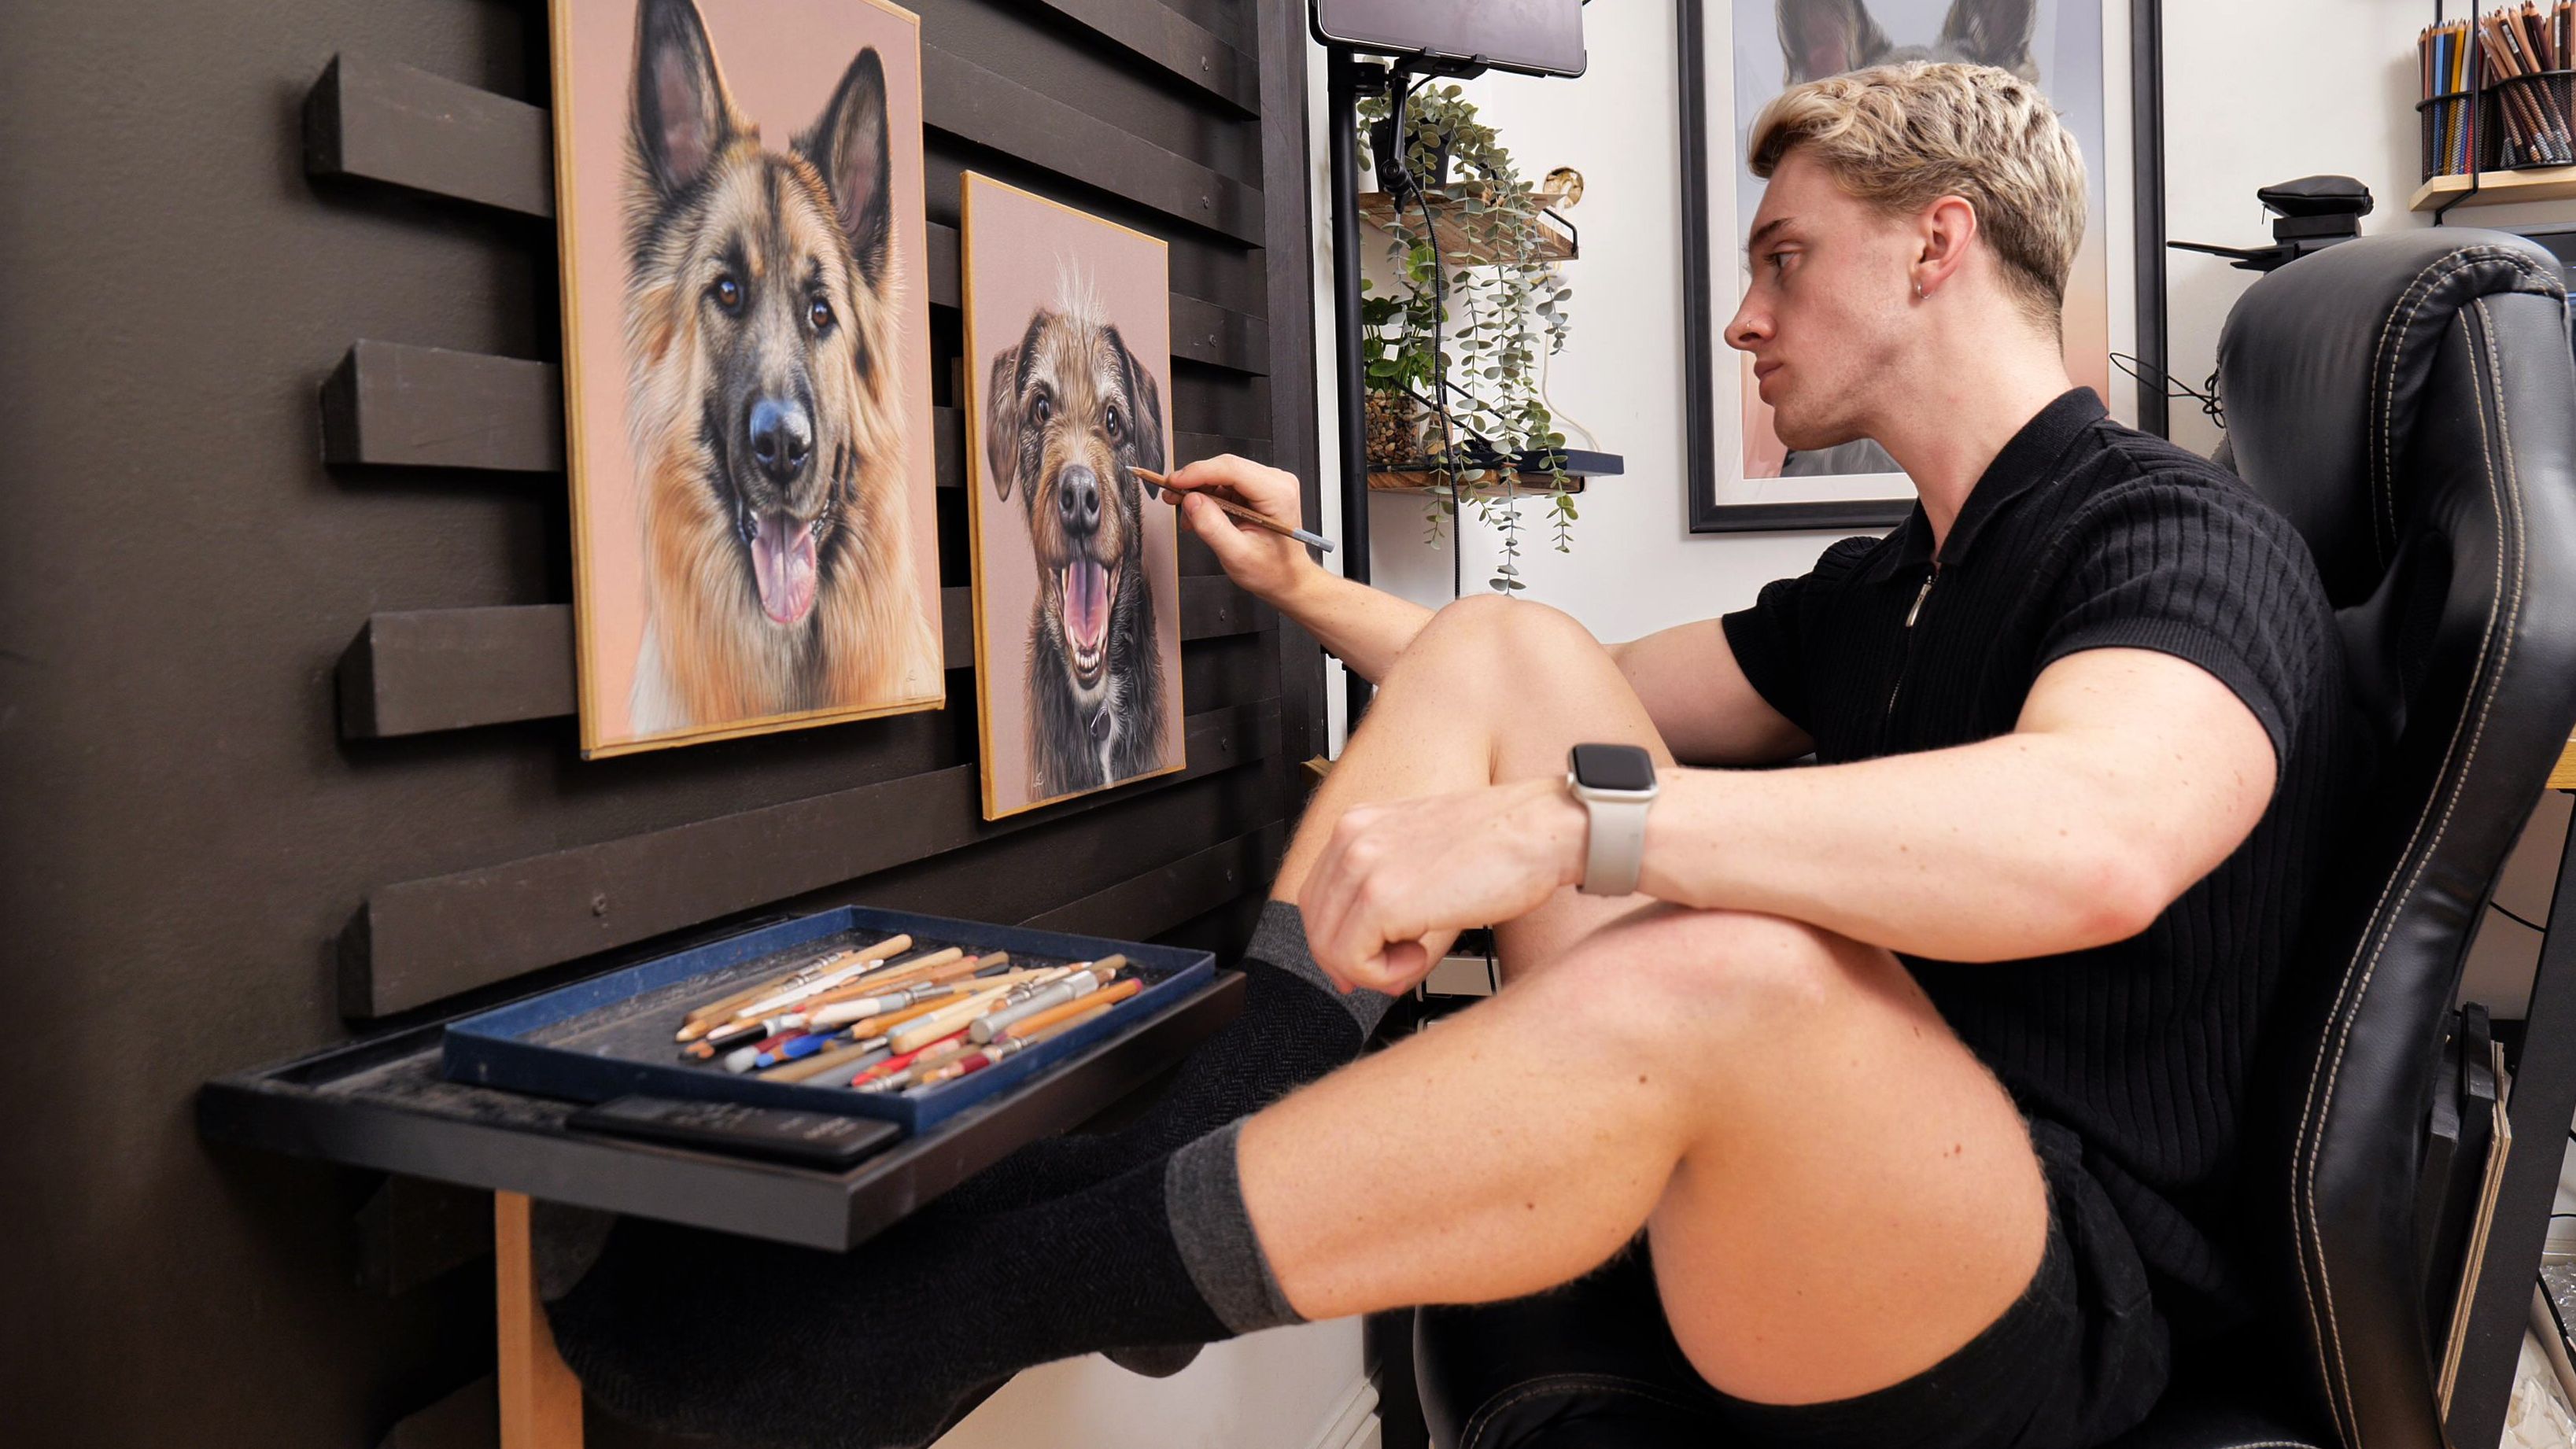
I get asked about this all the time on my social media and This is my French cleat wall where I create all of my artworks. You can think of it as a giant easel that enables me to hook my drawings onto. I ordered my French cleats on eBay but I know you can also purchase them on Esty, and they work by hooking and holding onto one another. If we take a look to the side, You can see that all of the cleats are facing up on my wall
I can then screw or tape a cleat slat facing down onto a drawing board and then hook this onto the cleats of my wall which are all facing up. This keeps my boards up close and snug to the wall. The boards can then be moved side to side and up and down. This has enabled me to really open up the space in my studio, eliminating a need large tilted desks or easels. I tried a few easels and on top of taking up a lot of space, they always managed to shake and buckle which was annoying. I started my business by using a tilted desk but it wasn’t a perfect fit. The desk took up a lot of precious room and also limited the size of the artworks I could create.
The desk made it hard to reach the tops of large artworks and even larger artworks wouldn’t even fit on the desk at all. This isn’t an issue with the French cleat wall set up however, I can go as big as the wall will allow me and stand or move the board up and down to reach any areas if I wish. It’s also a lot easier to position the camera and film an artwork that’s vertical as opposed to on a desk. Furthermore – a vertical position will eliminate any distortion seen on the camera as opposed to a tilted view. If I don’t have any wooden boards that are a good fit for the artworks on my wall easel, I can cut custom sized foam board sheets which are perfect as they’re lightweight but sturdy.
Working upright on this wall also means I am able to stand back to look at my artwork in full view. While doing so, I can also easily compare it to the reference photo on my ipad. My Ipad is positioned to the right here and I’ll talk more about in a little bit. This is a vital step for me when drawing realistically, standing back and looking at a piece in its entirety is very helpful to see what is, and isn’t working.
– French cleat slats: https://creatoriq.cc/3sY6lmN
– Tray: https://amzn.to/3rv0DIy
– Paint: https://amzn.to/3EKTl6v
Chair


As I work at the cleat wall, I do stand some of the time but most of the time I’m sat in my chair. It’s a 2nd hand desk chair and to start with, I’ve removed the arm rests and I’ve replaced the wheels with bell glides so top it from rolling all over the place. The best addition to the chair is this sturdy keyboard stand mount I fitted to act as a dynamic arm rest. It’s attached to the base and comes around the chair, able to move and be customised in many positions to be exactly where you need it.
If you’re an artist who draws for many hours, you may notice how easy it is to get back, neck and shoulder pain. I can tell you now that this chair and keyboard mount set up has completely solved that for me. I’m able to move it into positions that are personally comfortable for me and fix it into place. It’s very sturdy and offers extreme stability for my arm while working. This paired with my hand rest stick is an absolute dream team in terms of comfort. My posture has improved and I no longer ache from many hours of drawing.
– (many options – choose one with removable arms) Desk chair: https://amzn.to/3PpExiS
– Keyboard mount: https://amzn.to/3EIVxM2
iPad


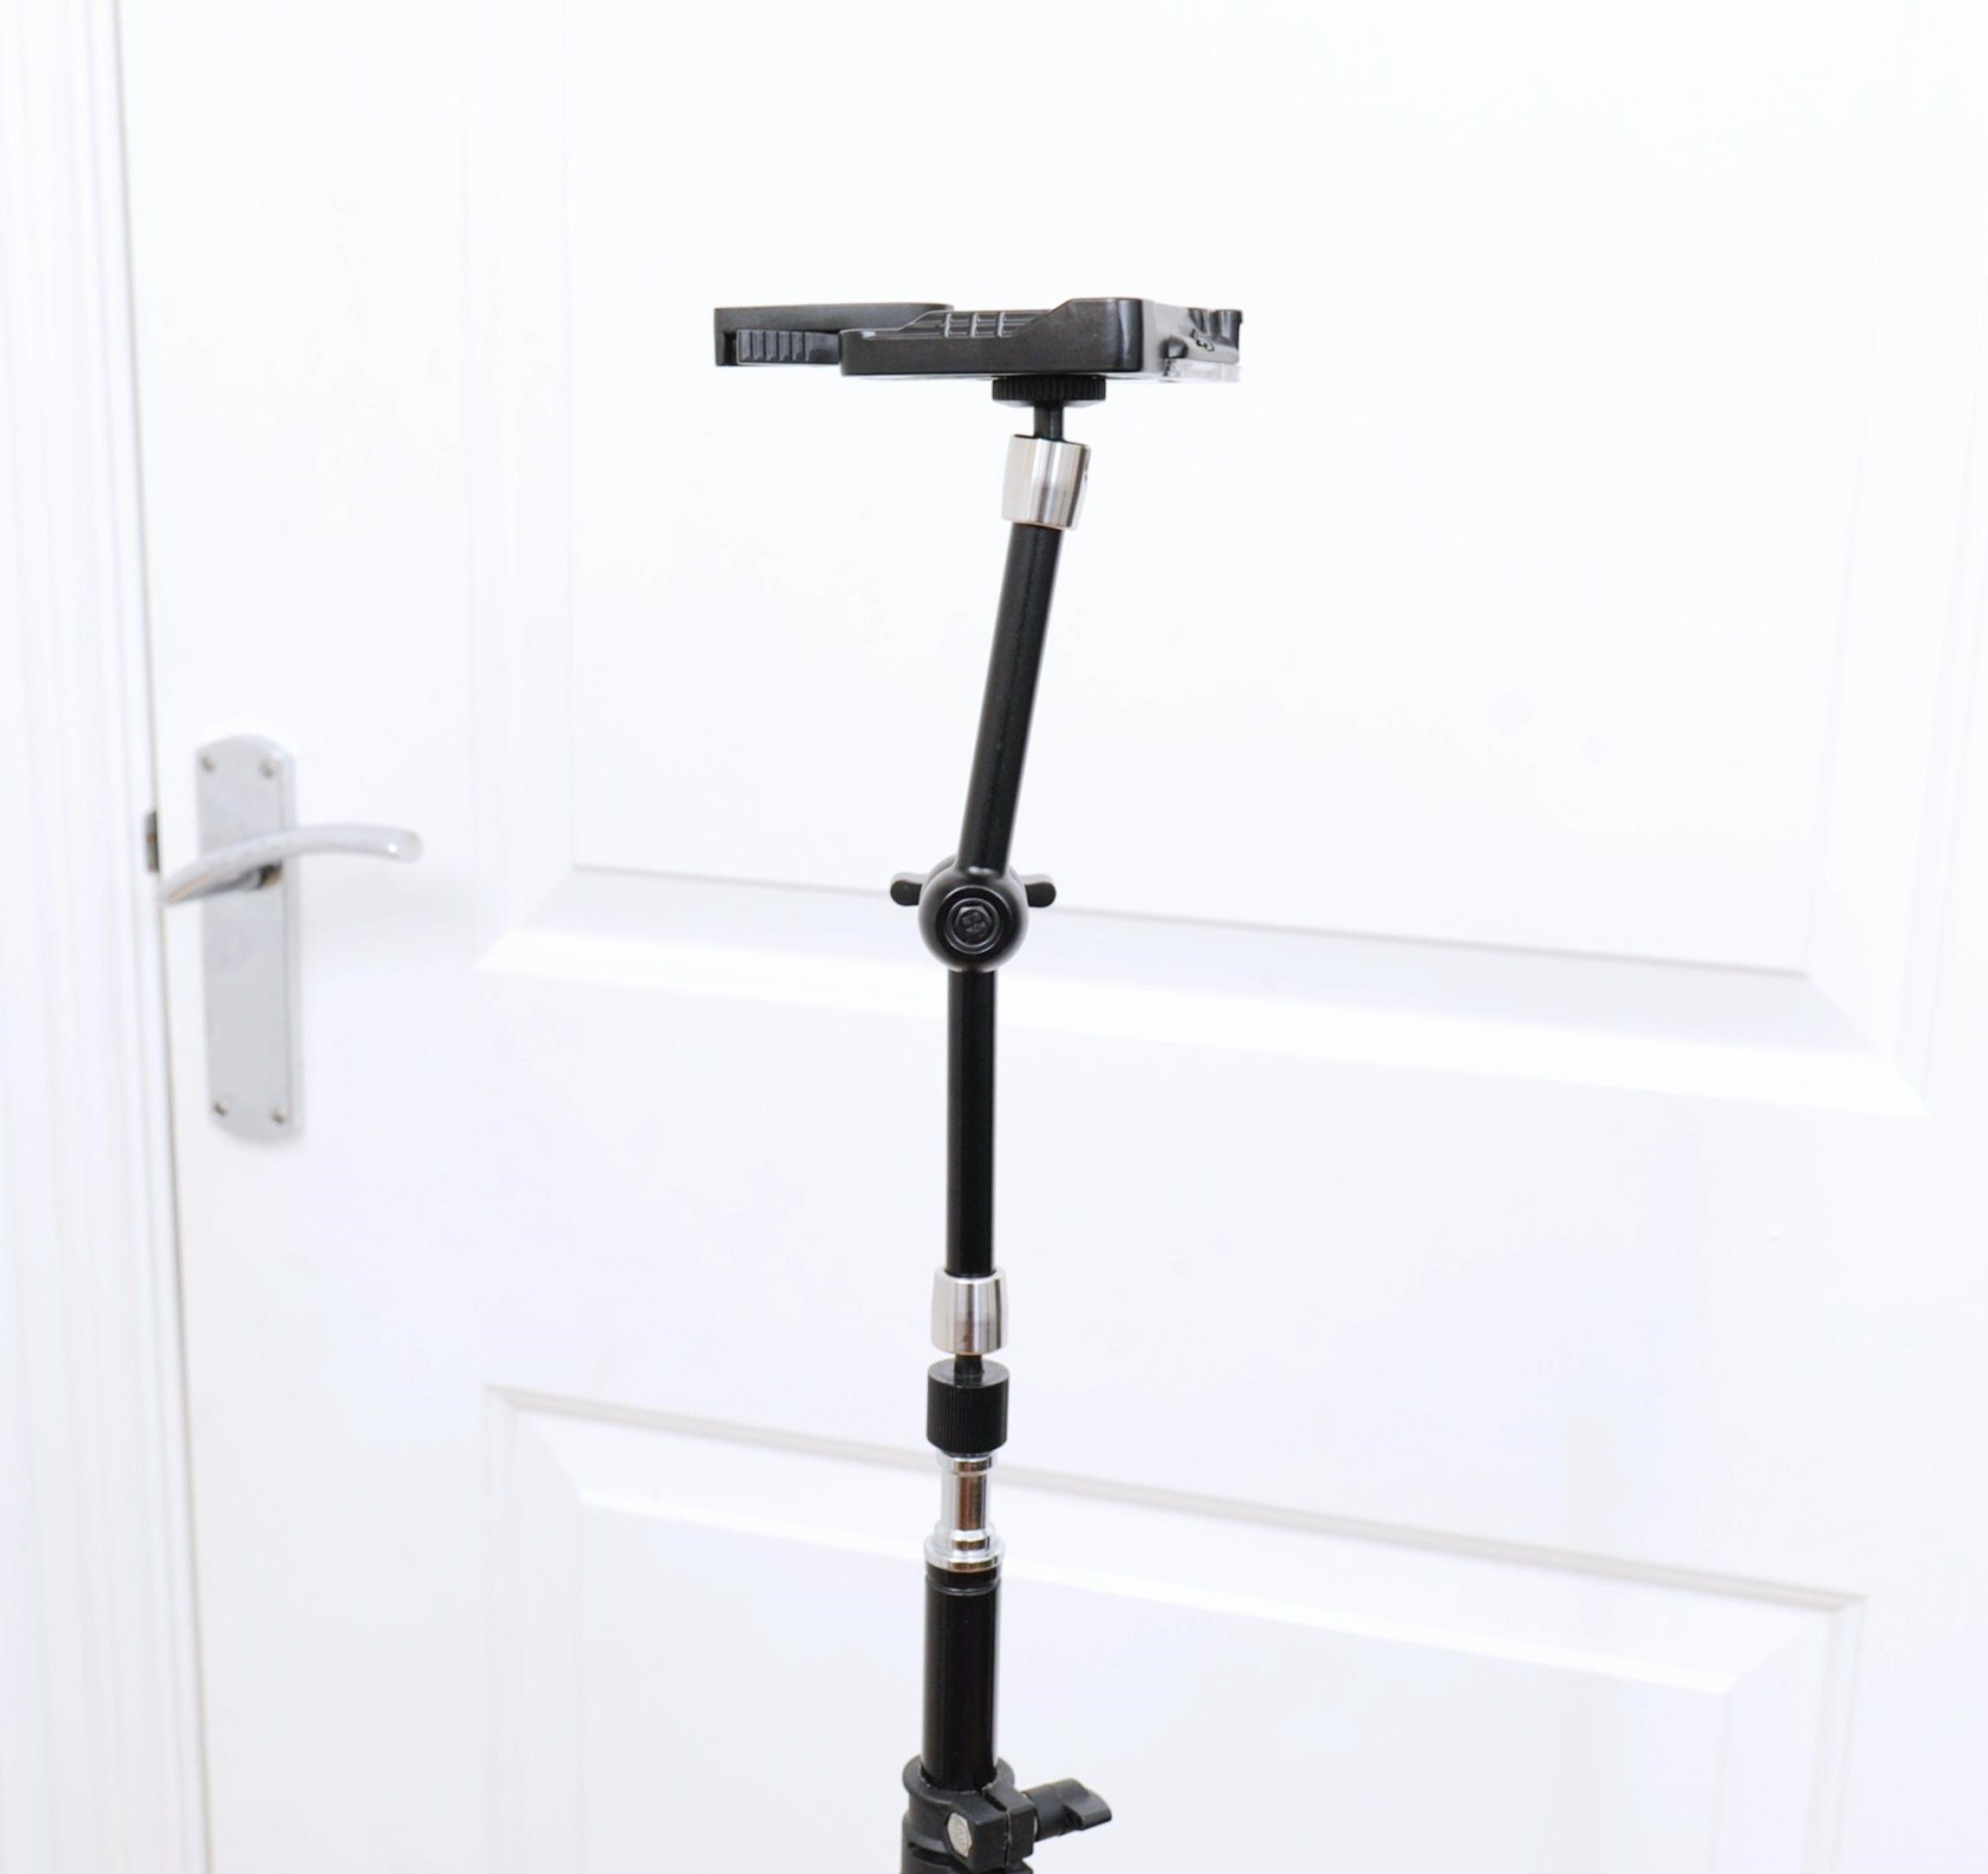
To look at my reference photos, I have my iPad pro right next to my cleat wall to easily see the image. This is important as I don’t have to keep turning my neck a lot for example if it was far away and the closer it is, the quicker and easier I can compare my artwork to the reference To hold the iPad in place, I actually screwed a hand rail I ordered from eBay to the wall which I then clamp it to using this magic arm. I can also move the iPad up and down the length of the bar and then tighten the clamp where I need it to be which is particularly useful when I go from sitting to standing or vice versa.
I love this set up for my small space as I used to use a light stand to hold the iPad but it would always get in the way. This is a much more convenient and hassle-free way to have my iPad next to where I work. The iPad was definitely an investment but I chose to splash out on it as the screen is of incredible quality. It shows deep, rich colours and also gets quite bright. It also has the added bonus of being a great piece of technology too so I can use it for digital art when and if I feel like it. What sold me the most to purchase this iPad over just printing out my references was the ability to zoom in close on details. When I draw or paint detailed work, I make sure to zoom in as much as possible so I can completely and easily see what’s going on.
– 2021 Apple iPad Pro: https://amzn.to/465qo1u
– Wall handrail: https://amzn.to/3RtM82w
– Magic arm & clamp: https://amzn.to/3RuGcq6
– iPad tripod mount: https://amzn.to/45Z7klk
Camera

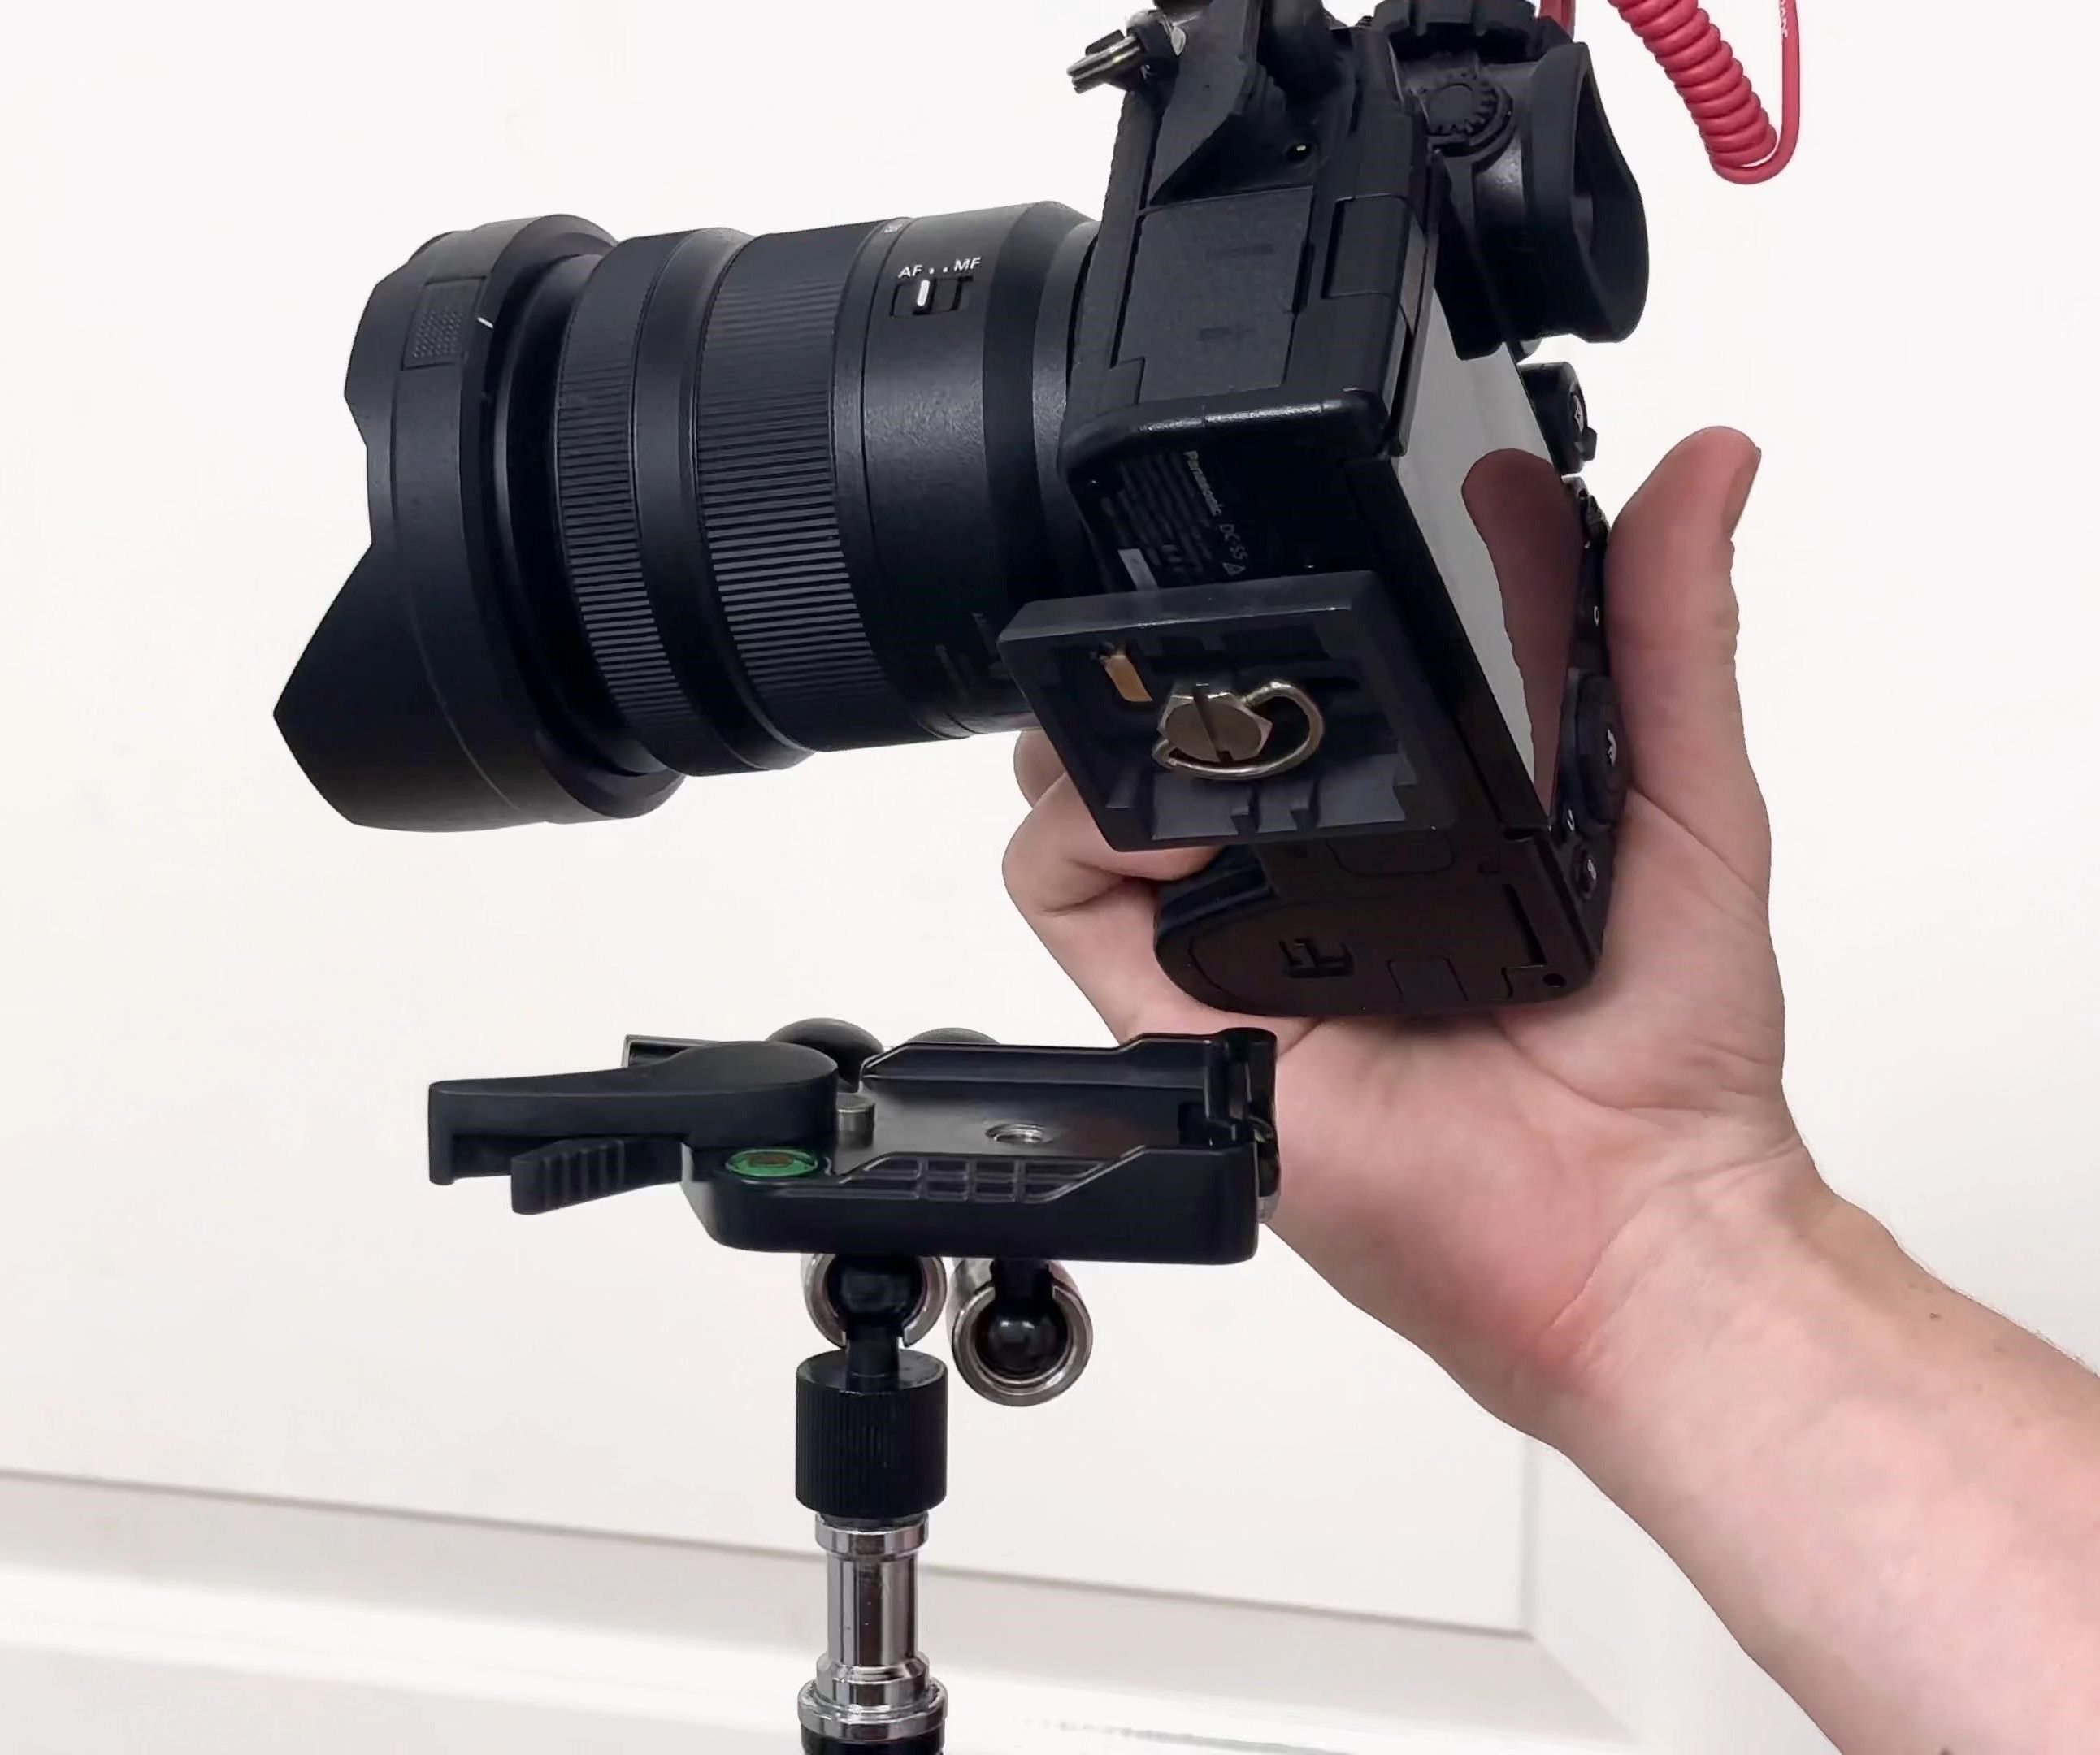
The camera I use for all of my content is the Lumix S5 with the 20-60mm lens. If you’re starting to purchase expensive items for your studio such as a good quality camera, I highly recommend looking for the monthly payment options on amazon – they are 0 interest for either 5 or 12 months which is what I did. Attached to my camera I have a small rode microphone which picks up all of the clear sounds when creating artworks, especially the soft pastels which I love.
this camera isn’t cheap and I had to work very hard to save for it but it with my whole business being online – I definitely consider it money well spent. And actually, for the quality and features, it’s one of the more affordable cameras at this level. If you’re looking for an exceptional camera, I highly recommend the lumix s5. I’ve owned two previous professional cameras, but they weren’t able to deliver the quality I desired. Despite the costly investment, the Lumix S5 has proven to be a worthwhile purchase, offering exceptional quality and features at a relatively affordable price for its level.
To hold my camera, I use this newer light stand. It’s height adjustable and the legs can expand out quite far which is great to make it extra sturdy. On the top fixture, I have a magic arm for all those angles and also a quick release plate. The quick release plate matches with the fixture on the bottom of my camera – which allows me to easily attach and remove my camera. This is so useful as in the past I would have to turn my camera physically multiple times to screw it on and dread taking it back off again. Now I just pop it on and off when needed.
– Lumix S5 camera 20-60mm: https://amzn.to/3N4DQcf
– Rode mic attachment: https://amzn.to/3LuKwlc
– Light stand: https://amzn.to/3sT6nMD
– Magic arm: https://amzn.to/48kIaiD
– Quick release plate: https://amzn.to/46jCrrr
Large Flat Tray Drawers


To store my soft pastel sticks & pencils, I use large flat trays called ‘Komplement’ from Ikea. they’re actually designed to fit into Ikea wardrobes to hold items such as jewellery or shoes. It’s of a bit of a DIY job because they’re not designed to be standalone drawers, but I really just wanted large tray draws which were near impossible to find. I bought the two wooden sides and a bunch of draws to go in between and it’s perfect for what I need.
The top draw is uncovered and easy for me to access and just holds whatever I’m specifically using for my current artwork. I usually keep my pastel box lids here to store pastel sticks and pencils, also my Sofft sponge tools with a bunch of replacements. Each drawer sits on little wheels so they are easy to pull out and I have them right next to where I work so I can easily access any specific stick or pencil as I’m drawing.
Keeping my materials organised like this has been so important for my productivity. Previously I often skip using certain colours or shades simply because I couldn’t find it & sometimes spent too long looking for specific pencils or sticks, this is no longer much of an issue with these trays. The whole setup is designed to allow me to work as stress free as possible and having these organised tray draws next to where I work has been super helpful.
– Komplement divider: https://bit.ly/3sYbr2p
– Komplement tray: https://bit.ly/45WWiNj
– Foam padding: https://ebay.us/uJtqwC
– Sand paper: https://amzn.to/3t81K1f
Computer Equipment

Like my camera, another incredibly important purchase for my art business has been my PC & monitor. I spend so much time editing videos and photos for social media, YouTube and Patreon that I knew I needed an upgrade to improve my work flow. Again, I saved up and invested in this kit with the aim for it to last me many many years. I custom built my pc on the website pcspecalist where I could choose the components that were right for me and my needs. As I edit 4k videos and large print photos on photoshop, it’s vital that I have the right hardware to cope with that.
Also having always been a bit of a pc nerd my whole life, it was very rewarding to purchase this for myself & I know it’s going to be worth it for many years to come. Equally the monitor has proven to be an important aspect for my online creation, seeing the detail in 4k and also in the correct colours has been a game changer for me.
The monitor I use is the HP Omen 27u and I couldn’t recommend it enough for those editing high-definition videos and photos. For what it offers and the professional sleek look, it’s definitely worth the money in my opinion. Having the ability to see the detail in 4k and the accurate colours has been a game changer for me.
After going through many keyboards and mice, I’ve settled very well with the ones I use now. The keyboard is the Razer huntsman which I’m really enjoying, it’s really comfortable to type on and it’s fun to customise the lighting. the mouse I use is the endgame xm1r and is also very high quality. As you may know I do a lot of voice over content for tutorial videos, and the Rode NT USB mini has been a joy to work with. If you need a compact, high-quality plug-in mic, I can safely recommend this mic.
For my sound I just use an amazon Alexa studio which can plug into my PC. I also love having an Alexa in the studio because when I’m sat down to draw, I can just shout over and begin playing or changing a song or podcast which I find very convenient. Lastly, I have this Tascam laviler mic, this is a portable microphone which is perfect for high quality audio. Especially useful for when you’re talking as you’re drawing for example, or recording your face as you talk without having a big microphone out of shot nearby. It’s surprising how good the mic is for such a small size.
I’m not saying you need to spend a lot on any equiptment at all – this is simply what I’ve purchased and that I can recommend works well for my art business workflow.
– Custom PC: https://www.pcspecialist.co.uk
– HP Omen 27u monitor: https://amzn.to/46ma8IP
– Razer Huntsman keyboard: https://amzn.to/460VdnI
– Endgame XM1r mouse: https://amzn.to/3Zqg55q
– Rode NT-USB Mini Mic: https://amzn.to/3rqUEVa
– Amazon Alexa speaker: https://amzn.to/3RuzgZJ
– Tascam Lavalier Mic: https://amzn.to/3t81ZcF
Printer

Underneath my pc desk is where my canon pro1000 printer lives. This Incredible printer was very kindly gifted to me by my grandma for my Birthday and it’s about the only thing in my studio that I haven’t purchased myself. It’s a large a2 fine art printer that allow me to create my own very high-quality prints straight from this studio. Creating prints, I would say is more of a hobby to me – most artists I know outsource the printmaking to a company which I also think is a great idea, but I’ve always wanted to print my own and have the full creative experience and control over what I put out to my customers.
The printer is definitely a long-term investment and for any artists considering getting one, I will warn you that it can be a lot of extra work if you sell well. You may find yourself printing, packaging and shipping prints for many hours instead of drawing or painting. However, I’ll always so incredibly grateful for each and every print order I receive. There is nothing quite like planning an artwork idea, seeing it come to life, and then creating the fine art prints to ship to customers all over the world which is why I love this printer so much.
– Canon imagePROGRAF PRO-1000: https://amzn.to/3t3CHNb
– Canson paper: https://amzn.to/452uNkr
Air Purifier


One of the most important additions to my health in the studio is the air purifier. I have asthma and as I work with a lot of soft pastels, it can get quite dusty in the studio. If I’m not careful, too much dust in the air will start to make me cough which obviously isn’t good. The thought of all the tiny particles of pastel dust entering my lungs is not a fun one so I invested In this very helpful air purifier.
If you also work with pastels or would just like your studio to have really clean, healthy air – I highly recommend one of these. There are many cheaper alternatives out there but after much research, this Philips model is the one that best fits my needs. It has a laser that scans the air for any debris or pollutants, and I can check the real-time readings on the device itself, or I can check the app on my phone. While it does a great job of keeping the studio air clean, it’s also actually raised my fears over pastel dust even more.
During a soft pastel drawing creation, there is dust in the air according to the app. It constantly reminds me that it’s absolutely vital to also wear a raspatory mask when undertaking dusty tasks for soft pastels, such as blending with a sponge or sharpening the pencils for example. The raspatory mask I use is the GVS P3 filtered mask and I like it because the filters are easily replaceable.
If I blow any of pastel dust off my work or blend with my sponges, within 20 seconds or so, the air purifier at the other side of the room will ramp up in speed as it’s detecting many particles in the air. Another great benefit of the French cleat wall is that the dust tends to fall straight to the floor instead of staying on my work and tempting me to blow it away.
it’s almost impossible to see pastel dust when it’s floating in the air so you may have a false sense of security thinking that it’s not an issue. but what I have found with this air purifier is how such a small amount of dust can spread out very easily all over my studio which will inedibility enter my lungs. The purifier has a 3 stage HEPA filter that is sure to catch the tiniest of particles. As I spend a high majority of my hours in this room, long term great health is my goal so this purifier is just another gadget to help me achieve that goal.
Another benefit I’ve come to notice with this air purifier is that as the air my studio is now more dust and lint free, so my artworks and fine art prints are better protected. It’s pretty simple, I just leave it on auto and it runs quietly in the background and only ramps up when the lasers detect anything in the air.
– Phillips Air Purifier: https://amzn.to/3rmI75e
– GVS P3 mask: https://amzn.to/3rmIfBK
(if any of these links stop working, please let me know in the comments & I’ll update them asap!)
DISCLAIMER: Some of these links are affiliated, however all of these recommendations are my own purchases that I have personally tried, tested and loved throughout the years. I am not paid directly by any of these companies to promote anything – it is 100% my honest views. If you do decide to purchase anything through these links, thank you so much for supporting me!
For even more of my studio & more recommendations, please feel free to watch the video version below: